Showing posts with label food. Show all posts

Saturday, May 26, 2012

Cupcake Love.

While I love baking all kinds of warm, sweet goodies, my favourite thing to make, and signature 'dish' would have to be cupcakes. Smaller, less messy and more easily transported than a full-sized cake, cupcakes are a sweet, versatile treat with limitless flavour and presentation possibilities. Perfect for a kiddy birthday party or a grown up afternoon tea, we pretty much always have some cupcakes on hand to take to work for a morning snack or to accompany an afternoon cup of tea.

This book by Martha Swift and Lisa Thomas from Primrose Bakery in London is my cupcake bible.

And it's these two basic recipes that I use most often. They are delicious as they are, and very easy to adapt to create different flavours, textures and combinations


Here's what the vanilla cupcake mixture looks like all ready to spoon into the cupcake trays. Yum!


For this batch which I made on Thursday afternoon, I turned the basic vanilla cupcakes into four different flavours - Nutella Swirl, Peanut Butter and Honey, Blueberry Cheesecake and Raspberry and White Chocolate - by adding a couple of extra ingredients straight into each individual cupcake just before they went into the oven.
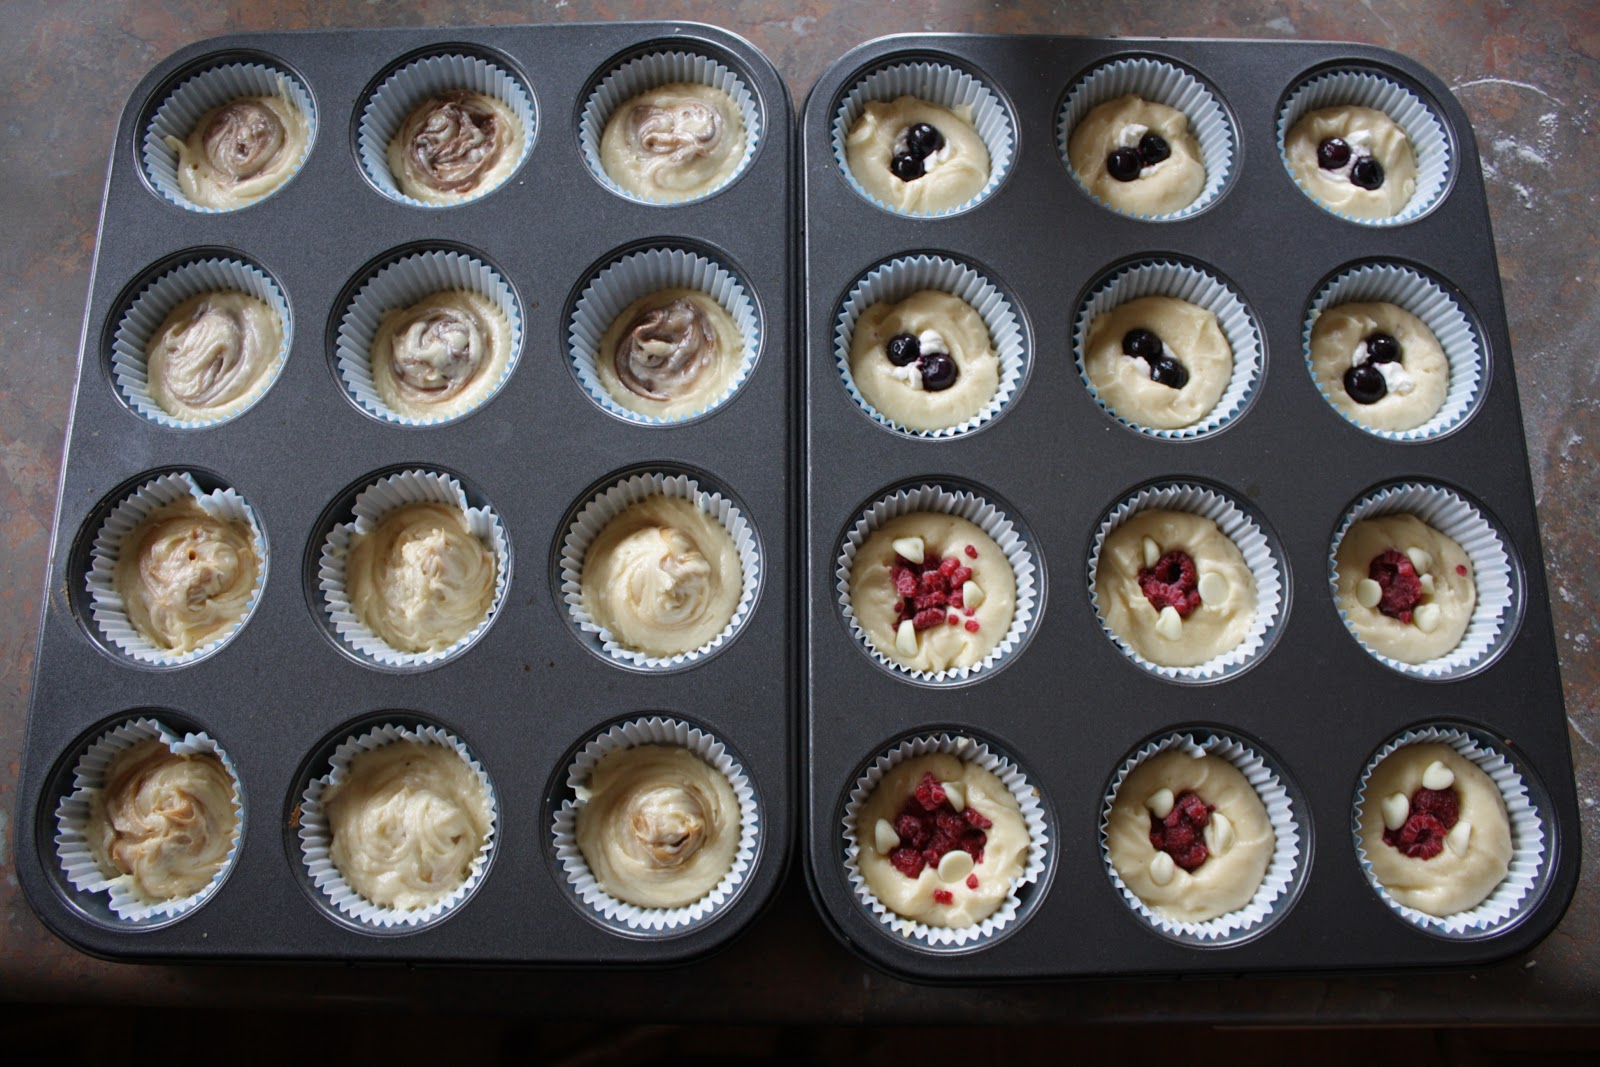

For the Nutella Swirl cakes, I added about half a teaspoon of Nutella straight from the jar and used a toothpick to swirl it through the top of the cake batter.

To make the Peanut Butter and Honey cakes, I used two teaspoons to roll about half a teaspoon of peanut butter into a ball and dropped in on top of the cake, then used a toothpick to roll some of the batter over the top of the ball.

To make Blueberry Cheesecake cupcakes, I pressed two frozen blueberries and a little chunk of nice strong Danish cream cheese down into the batter so they were half-submerged in the cake mix.

And finally, for the Raspberry and White Chocolate cakes, I pressed two or three frozen raspberries and three white chocolate chips into the batter.

All of these went into the oven for 20 minutes, and viola!


Gorgeous, golden brown cupcakes, four ways.

Next step: icing.

I made a batch of vanilla butter cream as the recipe instructs, then divided it evenly into four different bowls.


For the Blueberry Cheesecake cupcakes, I stirred a tablespoon of cream cheese through one bowl of the divided-up butter cream, and popped a single frozen blueberry on each cake. 


To finish the Raspberry and White Chocolate cakes, I stirred about a tablespoon of melted white chooclate through the butter cream, and topped each one with a frozen raspberry.


The Nutella Swirl cupcakes need only one thing to make them even more amazing than they are on their own - more Nutella! So I added a couple of teaspoons of Nutella to the butter cream and stirred it through. If I'd had some hazelnuts I'd have put either a whole nut or some crushed nuts on top of the butter cream for some extra crunch.


And to add the honey element to the Peanut Butter and Honey cakes, I stirred a nice big tablespoon full of some locally produced organic honey through the butter cream and then dribbled a little extra on top. This flavour is my husband's favourite. 

There are plenty of other amazing recipes in this book that I keep coming back to, and I'll let yopu know about them another time. 

Do you have a favourite cake recipe that I should try out?

Anna.


Market Value.

My crafty friend Smee and I have been talking about selling our creations for some time now. Our dream is to one day have a cafe and shop where we can bake, crochet and craft with our friends and sell the beautiful things we make. In three weeks we are taking our first step into the world of sales and having a market stall in the Raymond Terrace Community Markets in Riverside Park on the 16th June! Yay! While it is a humble beginning, we are very excited to be unleashing our hand-made, heart-felt creations into the world!

Want to see some of the things we'll be selling?


Stay tuned for more market goodies as the day draws nearer!

Anna.

Thursday, May 24, 2012

Bread and Butter.

I have become a bit obsessed with this season of Masterchef Australia. I've never really gotten into it before this year, but I am LOVING it in 2012! I especially enjoy the master class episodes, where expert chefs teach the contestants how to make one of their signature dishes, and THEN the recipes are posted on the Masterchef website. So when I watched Phillippa Grogan of Phillippa's bakery in Melbourne share her bread-baking expertise, then found the recipe for the amazing-looking fig and walnut loaf she made for the contestants, I became totally consumed by the idea of baking my own bread.

I re-watched Phillippa's segment online a couple more times to familiarise myself with the techniques and processes, convinced myself that it looked pretty easy, and then on Tuesday afternoon, a bit before 4pm, I began the bread baking process.

Phillippa used figs and walnuts in her bread. I don't care for walnuts and I don't adore figs, so I decided to use almonds and dried cranberries. I soaked the cranberries in warm water while I measured out the other ingredients - yeast, plain flour, wholemeal flour, salt and my almonds - then drained the cranberries, and decided to use the cranberry water in the bread.


I then combined the flour, salt and yeast in a big mixing bowl, poured the water in and mixed it together with my hands.


The next step was kneading. Phillippa had a very specific kneading method, stretching the dough out, rolling it up, turning it 90 degrees, and repeating 3-6 times. Once that's happened, you press the dough out into a rectangle, sprinkle the fruit and nuts onto the dough, roll it us and knead it again until the fruit and nuts are bursting out. 


Next: proving. This is where you leave the dough to rise. It needs to sit for an hour, but it needs to be 'knocked back' - ie, kneaded the same way as before - at 20 minute intervals during the hour. So the dough went under the Pyrex dome, and the timer went on for 20 minutes.


Once that hour was over, it was time for the final knead, and to shape the loaf. Using the same stretching, rolling and turning method, I kneaded and shaped my dough. This is how it looked:


Now that it had been kneaded and shaped, it had to prove for another hour. This time, the recipe recommended to make a little protected atmosphere inside a big plastic bag for the final prove, so I peeled a new garbage bag off the roll, slipped the bread board and dough inside and tucked the end under to seal the air inside, and set the timer for another hour.


This was the time to pre-heat the oven to 250 degrees. 250! I've never had to make the oven so hot for anything I've ever cooked! Anyhow, I was so impatient by this stage. I just wanted to cook and eat my bread!

FINALLY the hour was up, the timer went off and it was time to bake! I made some slits on the top of the dough before it went into the oven, which not only makes the bread look pretty, it helps steam to escape the baking bread. Here's how it looked just before it went in the oven:


I'd had a tray heating in the oven for the whole hour, so I slipped the loaf onto some baking paper, opened the oven door and practically threw the loaf onto the tray because it was so HOT! Phillippa's next trick came into play here - have a second tray under the oven rack the bread will cook on, and just as you put the bread into the oven, throw a small bowl of ice onto the lower tray. This helps give the bread a really crunchy crust. Once the bread and ice were in the oven, I turned the heat down to 200 degrees and set the timer for 25 minutes. Once THAT timer went off, I stuck the handle of a wooden spoon into the door of the oven to let some of the excess steam out for five more minutes.

At this point, I was pacing the kitchen, constantly checking the timer to see if it was nearly done! As the final minutes ticked down, my excitement grew! I'd made bread! I couldn't wait to taste it! And then ... IT WAS TIME TO TAKE IT OUT OF THE OVEN!!! 


I managed to restrain myself for a while to let it cool a bit before I took to it with a bread knife! But when that moment finally came, I was not disappointed.


It was delicious! I toasted a couple of slices this morning for breakfast - still amazing!

I'll make this recipe again for sure. It was easy enough, though a bit time consuming, but the end product is totally worth the time and effort. Next time I might leave out the nuts and just use two different fruits, maybe cranberries and apricots.

Next post I'll tell you all about something exciting happening for me soon.

Anna.